A Practical Guide to Image Capture for Individual Identification: Achieving High-Precision Inspection Through Reliable Systems
"Individual identification" using AI—it sounds like a cutting-edge, daunting concept. You might find yourself hesitating, thinking, "Doesn't it require expensive specialized cameras?" or "Is it impossible without advanced knowledge of optical engineering?"
However, the reality is quite different. The most critical factor in image capture for identification is not the price tag of the equipment, but the reproducibility of the conditions.
In this article, we will explain the essential points for practitioners who are wondering what kind of images are needed to get started, using specific technical examples.
1. A USB Microscope (e.g., Dino-Lite) is Sufficient: Aim for "1,024 x 1,024 Pixels"
You don’t need to invest in high-end DSLRs or expensive industrial cameras from the start. A resolution of 1,024 x 1,024 pixels (approx. 1 megapixel) is a solid benchmark for individual identification—a spec easily covered by most commercial USB microscopes.
- Why is resolution important? AI learns minute surface characteristics—such as patterns, textures, and grain variations—that are often invisible to the human eye. If the resolution is too low, these fine details are lost, making it impossible for the AI to distinguish between items. Meeting this minimum requirement is your first step toward successful identification.
2. Eliminate Noise: Fill the Frame with the Target Surface Only
The ideal image is one where the target observation surface completely fills the frame.
- Why exclude the background? Unlike humans, AI does not inherently understand context; it doesn't know to "ignore the background." It processes every bit of visual information in the shot as a "feature" of the object. If scratches on a workbench or shadows from nearby equipment are visible, the AI may mistakenly learn the background as the identifying feature. This leads to a failure in logic known as "overfitting."
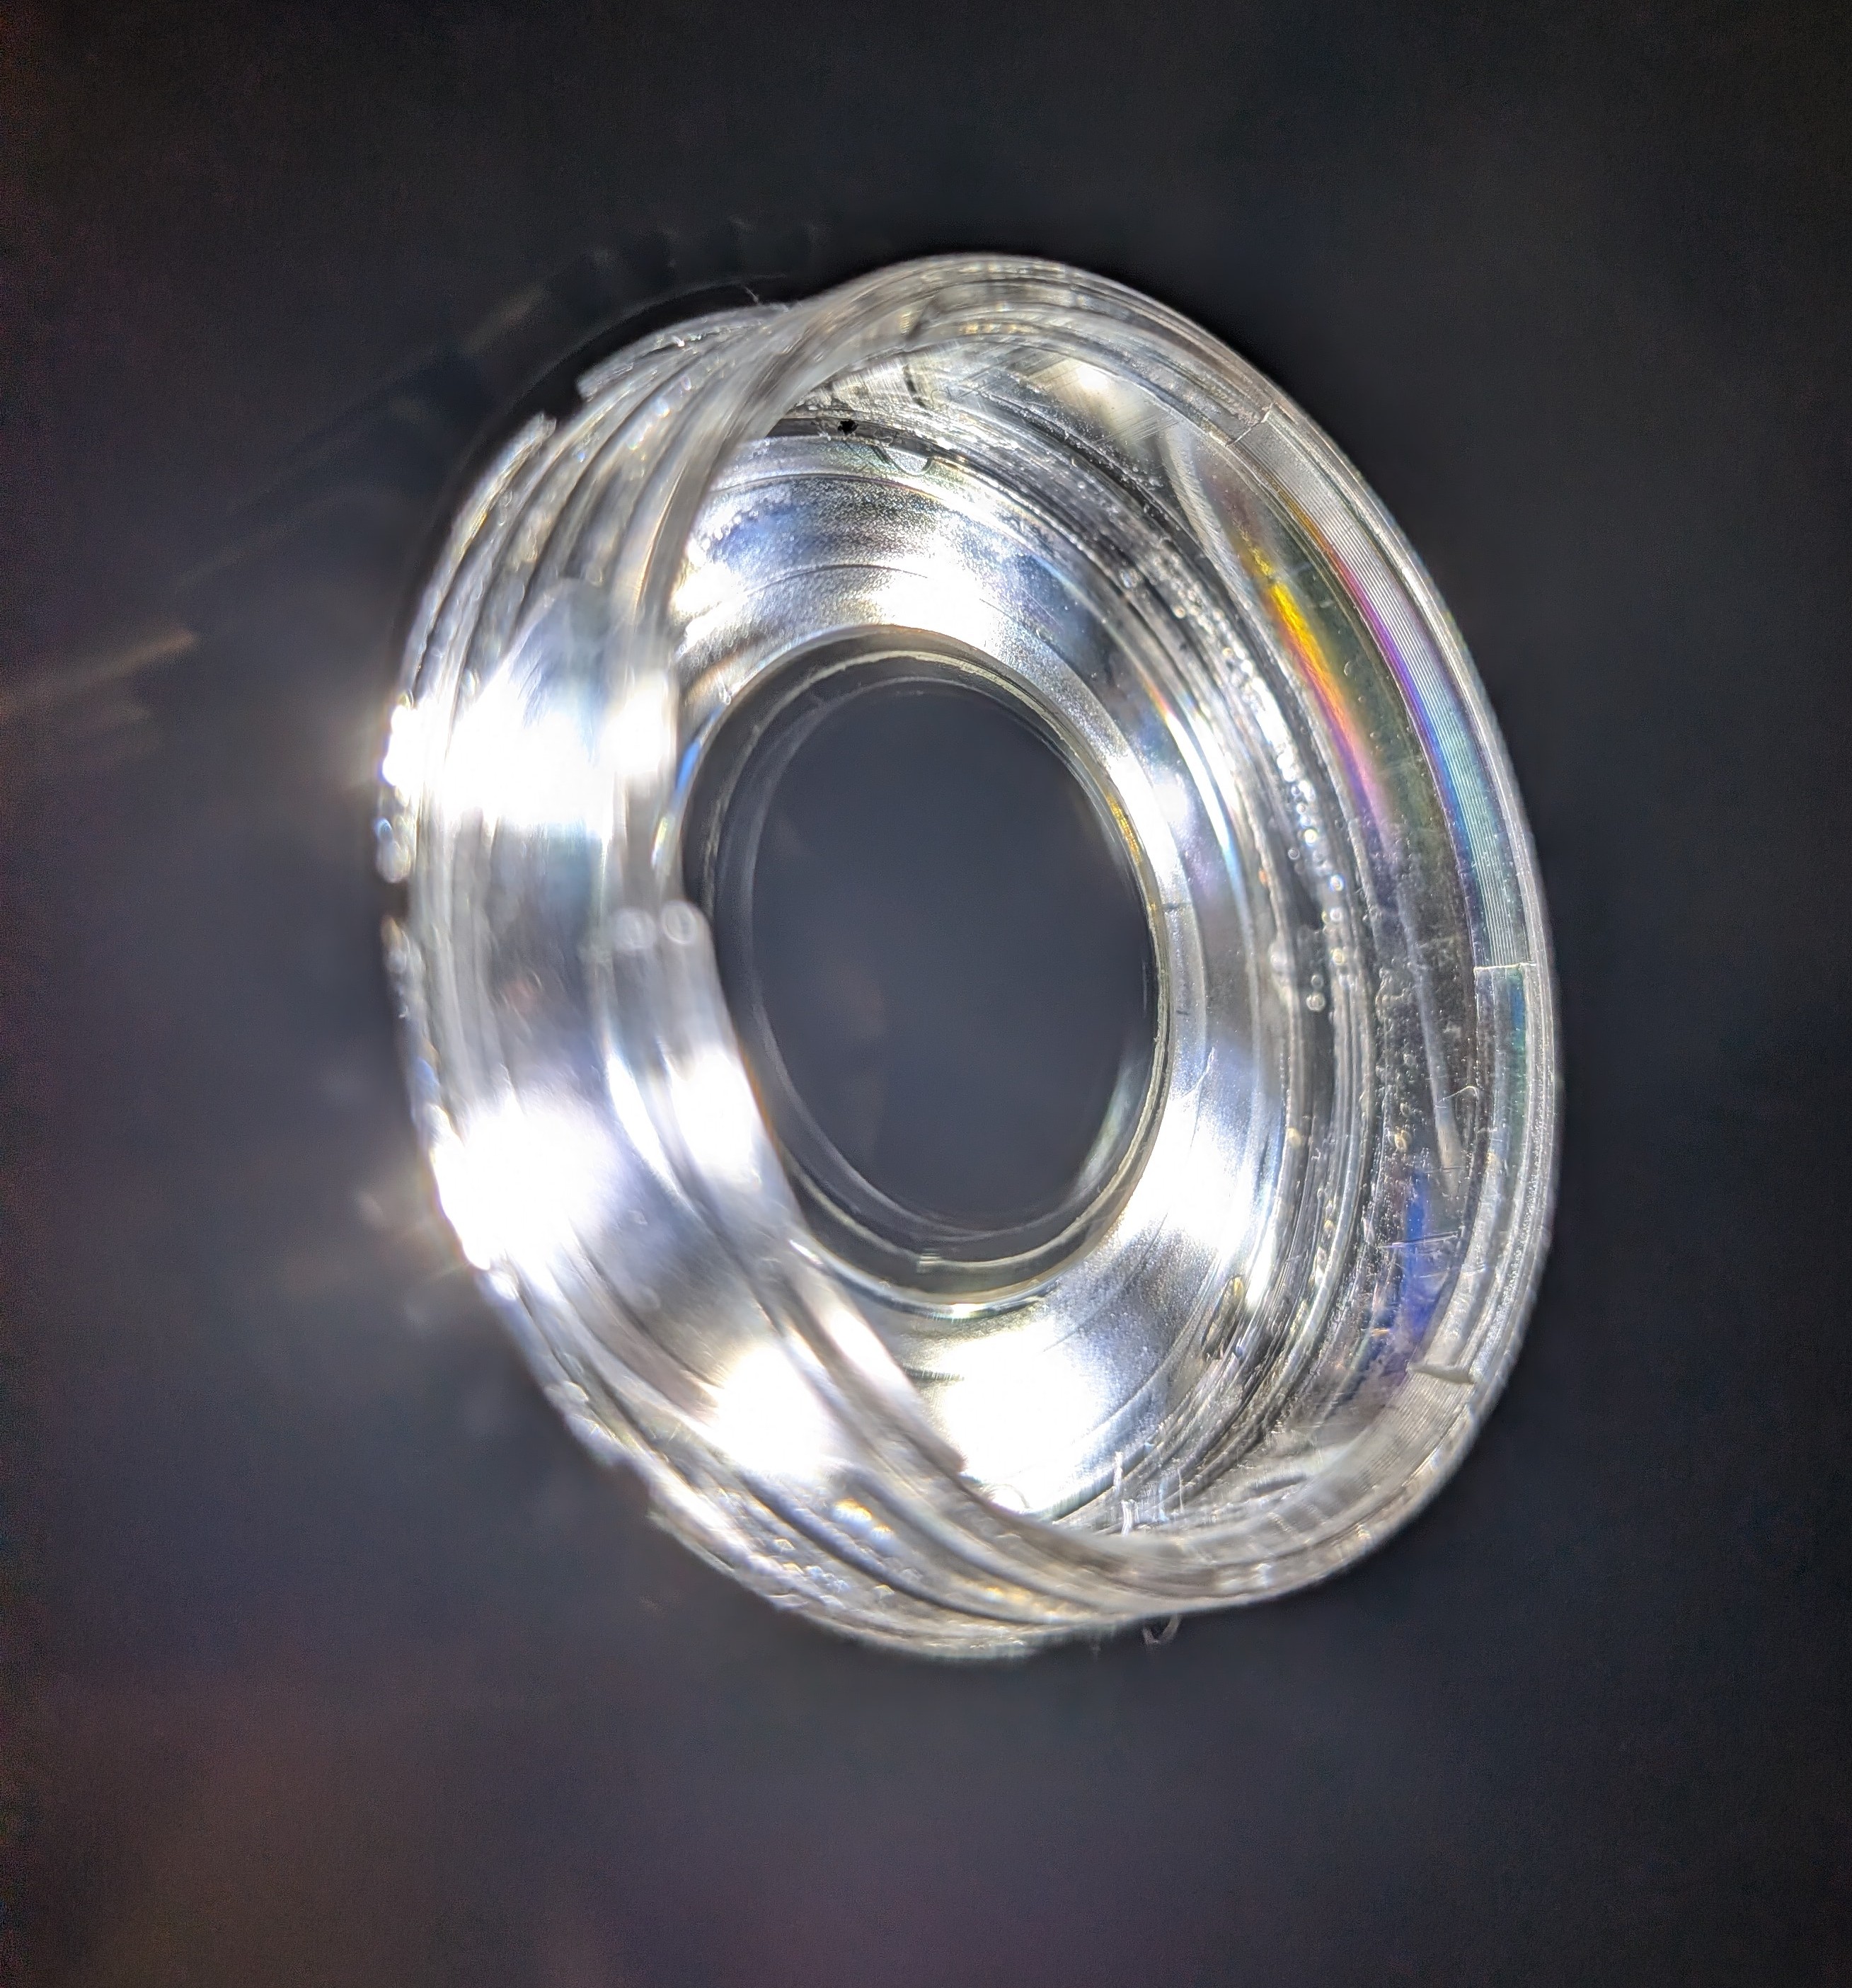
3. Uniform, Shadowless Lighting via "Industrial Ring Lights"
While shadows can add a professional look to artistic photography, they are a major source of error in individual identification.
- The problem with shadows: AI cannot easily distinguish between a physical texture on the object and a transient shadow. If the lighting angle shifts slightly between registration and verification, the resulting change in the shadow will cause the AI to judge the object as a "different item."
- Pro-Tips:
- Use Industrial LED Ring Lights: These provide uniform illumination from all angles around the lens, minimizing shadows.
- Use Diffusion Plates: These soften the light to prevent "blown-out" highlights (glare) on metallic surfaces, which is crucial for capturing clear data.
4. Maintain Parallel Alignment Between the Lens and the Surface
Even a slight tilt in the camera angle means distorted data for the AI. The rule of thumb is to keep the lens perpendicular to the target surface (parallel alignment).
- Visualizing Distortion (The Pencil Example):
- Direct Shot: Captures a perfect hexagon with the lead centered—accurate data.
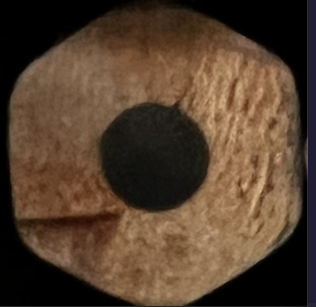
- Angled Shot: Distorts the hexagon and introduces unwanted textures from the side of the pencil. Because a change in angle drastically alters the "feature values," using a dedicated stand or jig to physically fix the angle is the fastest way to improve accuracy.

- Direct Shot: Captures a perfect hexagon with the lead centered—accurate data.
5. [Crucial] Prioritize a "System Anyone Can Use" Over a "Perfect Shot"
The most important mindset for successful individual identification is this:
"Reproducible captures using a USB microscope and a stand are far superior to a single 'perfect' shot taken with an expensive camera."
This is the secret to stable, long-term operation.
- Ideas for Increasing Reproducibility:
- Use a Dedicated Stand: Avoid handheld capture. Fix the microscope to a stand to keep the focus and distance constant.
- Implement Workpiece Guides: Use physical stoppers to ensure every object is placed in the exact same position. By "systematizing" the process, you ensure that anyone can generate consistent data, regardless of their skill level.
Supplement: Items Suitable vs. Unsuitable for Identification
AI has its strengths and weaknesses. Use the following as a guide before implementation:
⭕️ Suitable: Surfaces with microscopic variations/patterns and rigid shapes (e.g., metal parts, resin molded products, wood, PCBs).
❌ Unsuitable: Perfectly homogenous surfaces with no features, highly reflective mirror surfaces, or objects that change shape (e.g., cloth wrinkles, liquids, highly transparent glass).
Summary: Start by Fixing the Conditions
Image capture for AI identification isn't a craft that requires years of training. It’s simply about:
- Defining the capture conditions (angle, lighting, and frame).
- Fixing those conditions using the right equipment and jigs.
By focusing on these two points, AI identification transforms into a practical and powerful tool for your workflow. Why not set up a USB microscope on your desk and take a few test shots today? That first step toward "systematization" is where the real potential for efficiency begins.